Pages

Monday 26 August 2013

Workbench shot

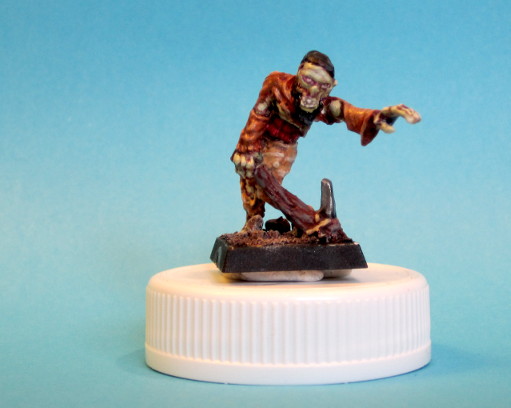
I have been away and haven't have had so much painting time lately but here is quick snapshot of my workbench. The wyrdstone counters are done, really happy with how they turned out. The skeleton is almost finished, just got the base and some minor touch ups left, same with the dire wolf. I have to say the Otherworld minis are really fun to paint, brilliant quality and I'll definitely be buying more lead from Otherworld in the future!
I'm not entirely happy with the bone on the skeleton, but I have just placed an order on some W&N inks that I'll be experimenting with on the other two. Also as per Stonecoldlead's instructions I need to get hold of some VMC "greys", medium, stone and silver grey.

Thursday 8 August 2013

Workbench shot

A lousy phone cam shot of my workbench today. Just got some stuff from Otherworld that I have cleaned and assembled. I bought a pair of dire wolfs and some skeletons to fill out the ranks of the undead warband. Top quality minis, can't wait to get these ones painted. I will probably be getting more stuff from them in the future!

In the background you can also see some wyrdstone counters I'm working on as well as that necromancer I wrote about a while ago.

Friday 2 August 2013

[Tutorial] How I varnish my minis

I thought a quick guide to how I varnish my minis would be appropriate as it seems to be something many people struggle with.

My way of varnishing was inspired by Orctrader. His excellent guide came up while I was searching for a good way to get a matt finish with brush on primer. I thought a guide with pictures maybe could help someone  First off, I use a brush on varnish because of the dangers of frosting. The phenomenon when a spray based matt varnish can leave a cloudy finish. As I have never gotten a spray primer to work well for me I just went straight for the brush on ones. As Orctrader I use two varnishes:
  • Daler Rowney Soluble Gloss Varnish
  • Daler Rowney Soluble Matt Varnish
Gloss Varnish apparently protects your minis better than the matt one does. I don't know how much of this is true, but having a gloss coat over your paint job makes it easier to see any spots you've missed with the matt coat.

Here is a mini before any varnish, nice matt paintjob.

I start with a thin coat of the Gloss varnish. As when painting your minis, don't just splash the varnish on. Wait 24 hours for it to dry. It gives a wet, glossy finish. Yuck.


After waiting 24 hours I varnish again, now with the matt varnish after shaking the bottle vigorously for a while. Brush the varnish over the whole model and do just one thin coat. The gloss varnish helps you spot any places you've missed. Wait 24 hours for it to dry. If you see some glossy spots, do another layer. You can also leave some parts glossy. I sometimes leave metals, gems, guts etc glossy to add to the effect I want to create.


And there you have it. A varnished miniature with a matt finish that won't cloud your paint job, but protect it against wear and tear.

Sunday 28 July 2013

A shadow elf and some wandering zombies

Here are the latest additions to my Mordheim warbands. As usual they were finished a while ago but I haven't bothered to take pictures.

I also made a little road sign out of a piece of skewer and some scrap bits of balsa. It got the generic fantasy treatment to work in as many settings as possible!

I tried an old school freehand shield design on the zombies shield. Unfortunately I overdid the orange glaze which took away some of the highlights and depth of the design. Its also a bit assymetrical but I'll probably get better at painting more symmetrical freehands with some practice. For a first attempt I think it went really well and I'll definitely be doing more old school shields in the future.


Saturday 6 July 2013

A Tolkien Bestiary

Yesterday I got this:

Tolkien was what got me into fantasy in the first place. I got the Fellowship of The Ring as a Christmas present from my aunt as a kid, finished the trilogy, proceeded to The Hobbit and Silmarillion and later got into Warhammer. I never had the Bestiary, but seeing it mentioned in a forum discussion about pre Peter Jackson LoTR and hearing about the artwork meant that I just had to get it. A quick check on Amazon and finding out that used copies are going for about 1 penny didn't make it a tough decision.

Overall the artwork has a much more dark age feel to it. Everything just feels more dark and sinister (and everyone wears chainmail). I haven't got time to look at anything more than the pictures so here are some photos taken with my phone camera.

See, John Blanche! 

Really cool map of Arda. Not all parts existed at the same time, but seeing it laid out made the different changes to the land much easier to grasp.
Look at those Uruk-Hai! 
Battle of the Five armies. I really love this one.

Monday 1 July 2013

Necromancer wip part 2

Today I finished the hat and added a skull to the staff. Unfortunately the skull needs pinning and as I couldn't find any wire of appropriate width this project will have to be put on hold until I do. The paper clips I normally use were too thick for the staff.

Saturday 29 June 2013

Necromancer wip part 1

It has been a long time since my last update, mostly because of my camera taking forever to set up for decent pictures. I've got the blogger app on my phone now though so hopefully the updates will be more frequent!
This time you get a lousy wip shot of my Necromancer taken with the phone camera. The conversion idea comes from Pil over att LAF and consists of the body of a Metal Magic cleric and the head of Morbius the liche. The neck joint has been hidden with bad putty work and the first part of his hat has been sculpted. I read somewhere that the best way to do hats is in two steps so that's what I did. It still needs trimming though.
In the background you can see some stuff knocked together with the excess putty. A cobblestone base for Aenur, some shrooms and the base for a sign post.

Tuesday 28 May 2013

Skeletal liche and zombie

Finally got a minute to take som pictures of the two finished undead, a zombie and a skeletal liche. Still struggling with taking decent pictures, but you get the idea. I'm currently waiting for two more zombies to show up in the mail. In the meantime I'll have to figure out what to use for the dregs. Any suggestions?

Also here's a wip shot of the Shadow Walker. The wood grain on the shield looks wrong so it will be redone, but most of all I'm wondering about the shoulder pads and what color to paint them. I have tried to keep the number of different colors used to a minimum. I'd love to hear some comments and suggestions!

Sunday 5 May 2013

Paper terrain

To get some terrain on the table quickly I have assembled two free pdf buildings from http://davesgames.net/ These were really easy and fast to assemble. I printed them on decal-paper that you just stick on a sheet of card and cut out. Use a sharp stanley and you'll have no problems cutting the parts out.


These are really very nice, but knowing how lazy I am have decided against making more, otherwise my other buildings will never get finished!

Undead

I have also started working on an undead warband. I will probably run it as the standard undead warband, but painting skeletons was fun so maybe it can be run as a Restless Dead warband for the Border Town Burning setting in the future.

The zombies are citadel C18 zombies, I still need a lot more, but these aren't that easy to get. The skeletons are Metal Magic ones from Mega minis, get these now if you can as Mega Minis are closing!


Shadow Warriors

I finished these 5 quite a while ago, I just haven't really bothered taking pictures. I'm still quite bad at getting good pictures, but this is still a big improvement.


They were not painted at the same time, so the two that were painted last look much better than the one that was painted first. The only thing left to complete the warband are the two shadow walkers and the shadow master. I still haven't decided for the shadow master but here are the wip shots of the shadow walkers. The Selafyn model has had the shield arm attached with magnets, in the future I hope to add the option of replacing it with a bow arm.